How to Reupholster Difficult Dining Chairs
My husband and I found a dining room set (for cheeeaaap) right before we got married. The table was great, but I was less enthusiastic about the chairs... and my hatred for the pleather has grown since that day. Since moving into our home our "to-do" list is neverending, but nonetheless, I stuck "reupholster dining chairs" to the end of it. I finally got around to it in early May and since it took me a full day to find the best method, I thought I'd share with you how I reupholstered our dining chairs.
How To Reupholster Difficult Dining Chairs
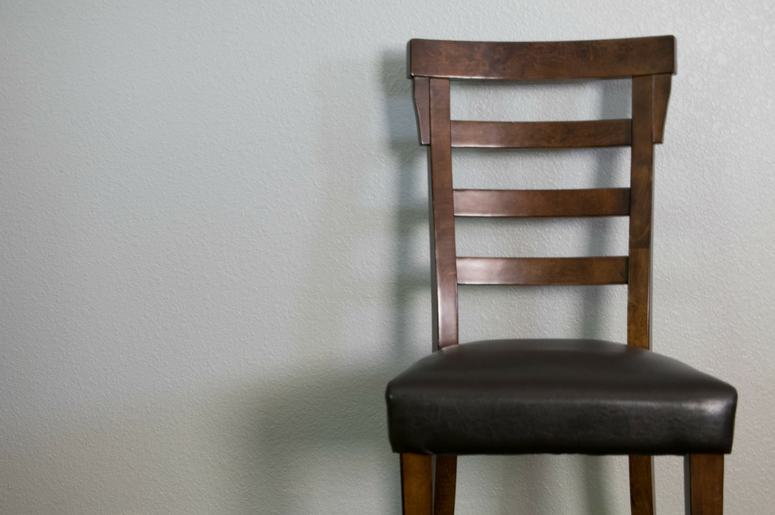
Most dining chair seats sit INTO the chair and recovering them is super simple (like this). However, our seats pretty much make up the chairs which made reupholstering them much more involved. I took apart the first chair and it took me about 30 attempts to find the right method. From my research, it appears we have Parsons chair seats, so I looked at several tutorials featuring full Parsons Chairs to find the method that worked best for me. Once I found it, though, it wasn't super difficult and the rest of the chairs came together easily. Below is a photo of our ugly "before" chair.
Recovering Dining Chairs
Supplies
-
- Staple Gun (this one has a fabulous remover tool which will save you so much grief!)
- Added foam padding (if necessary)
- Needle Nose Pliers
- Fabric Scissors
- Fabric Pins
- Sewing Machine/Needle and Thread
- Fabric of Choice (~3/4 of a yard for each chair for 54"+ bolt fabric)
- Allen Wrench Set (imperial and metric sets are great to keep around the house!)
Step 1 | Dismantle Chair
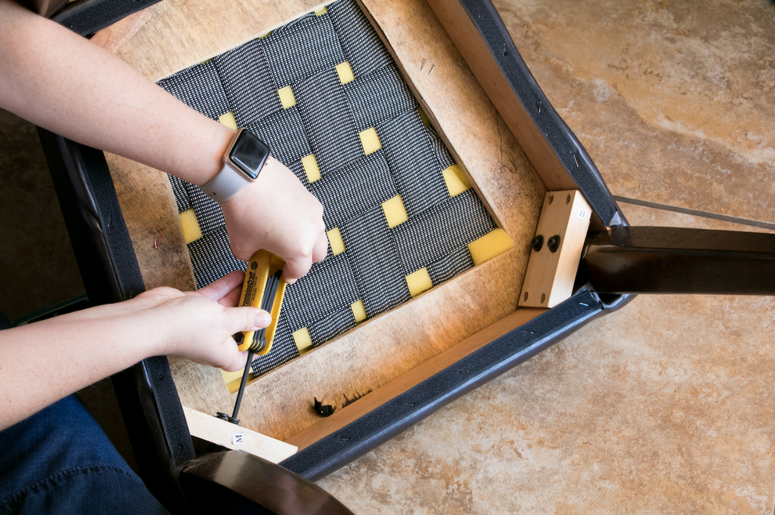
Before you remove the old upholstery, you'll need to dismantle the chair. Of course, all chairs are a little bit different. Mine was held together with 10 bolts. I removed the bolts with my allen wrench set and then I was able to remove the seat from the back of the chair. 
Step 2 | Remove Old Upholstery
Next, you'll take the old upholstery off of the seat. Once again, chairs will vary. However, I removed strips of velcro from the perimeter of the bottom of the seat first with pliers (the easy way is to grab hold of a corner and twist if you don't have a staple puller). Then, instead of removing all the staples from the seat, I removed the easy staples and for the rest I took a box cutter and cut on both sides of each staple. Finally, I just pushed back the old fabric and slid it off the seat. This was the most labor intensive step for me. So. Many. Staples. Next time, I'll invest in a staple puller.

Step 3 | Measure For New Upholstery Fabric
Let me preface this by saying - if you're SUPER type A, this method probably won't work for you. You'll want to bust out your tape measure. Due to the 3-dimensional property of my seats, I decided to skip measuring and just go with the eye-ball effect. Place your seat under the fabric and bring it in (like you're doing a loose cover for each seat). Make sure you have a few inches of buffer fabric and cut around the seat. Note: If you're adding padding to your seats, be sure you do this PRIOR to cutting the fabric. Just a little padding can be cause for a little more fabric per seat. You don't want to be short when you're putting them together later. 

Step 4 | Sewing Box Corners
Technically, I'm not 100% positive that these are "box corners" but that's the best descriptor I could come up with. When your seats are thick and square, it's so important to make the front of them look nice and neat. I despise puckering and if you don't sew pleats down the front, it's likely you will have puckering with your final product.  To do this, I turned the fabric right-side down onto the cushion. I double checked that all sides would reach the bottom of the chair comfortably for staples. Then, at the front of the cushion, I made a triangle at both corners. I turned the corners over and with a pencil, I made a line inside the corner. Then, I pinned the corners and sewed along the lines. This graphic might help you visualize this step better:
Step 5 | Assemble Fabric onto Cushion
Now that the corners were sewn, I flipped the fabric right-side-out and slide the corners onto the front of the cushion. With a partner's help, I pulled the fabric tightly and secured the fabric on the opposite side (the rear side of cushion) with 1 or 2 staples in the middle.  Then, I folded the fabric on the rear side of the cushion in an "envelope flap style" and stapled it as I pulled tightly on the fabric. Next, I stapled both sides of the seat cushion and the front while pulling tightly against the fabric to make sure no wrinkles occurred.
  Trim all the excess fabric!
Step 6 | Reassemble Dining Chairs
Now put the chairs back together as they were originally. The chairs are finished!!  My fabric covered the bolt holes, so I had to go in with very sharp small scissors and cut small holes to get the bolts back through. Depending on how your chairs are designed, this may or may not apply.
Update Old Dining Room Chairs
Overall, I am so proud of how these chairs turned out. No more "swampy butt" from sitting on the pleather (seriously... so many reasons to hate that fabric) and the style goes with the overall feel of our home a lot more. Plus, I basically got new dining room chairs for just about $60. Sure beats spending several hundred PER chair, doesn't it?

